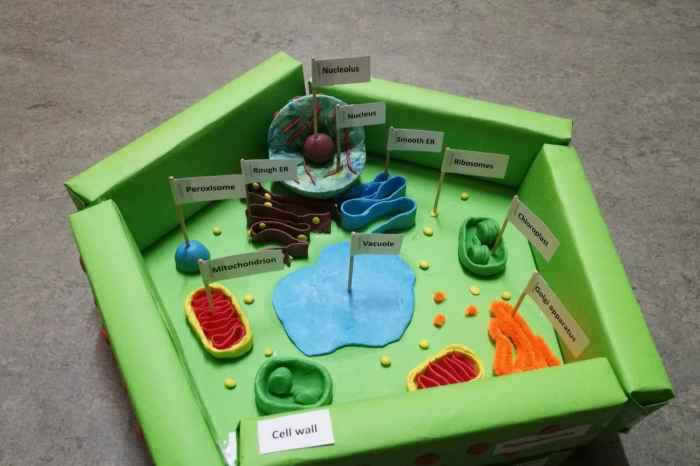
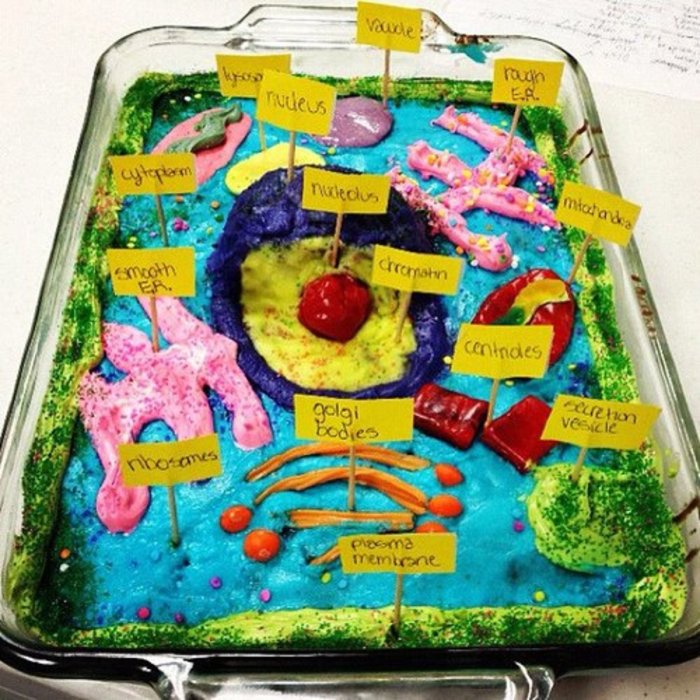
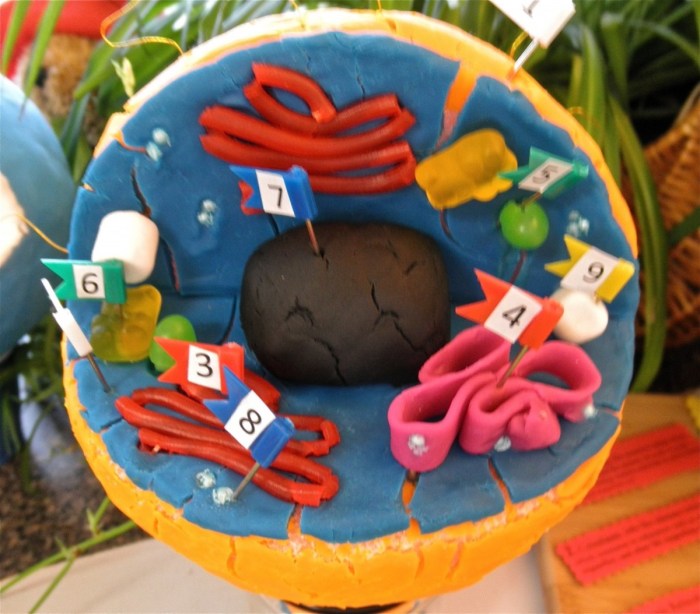
How to make a 3d cell model – Ever wondered what makes up the building blocks of life? You’re about to embark on a journey to create a 3D cell model, a tangible representation of the intricate world within our cells. This hands-on project is a fun and educational way to visualize the fundamental components of a eukaryotic cell, from the nucleus, the cell’s brain, to the mitochondria, the powerhouses that fuel cellular activity.
We’ll guide you through the process of selecting materials, designing your model, and assembling it with precision. You’ll learn about the functions of different cell organelles and how they work together to keep cells alive. Get ready to delve into the fascinating world of cellular biology and create a model that not only looks impressive but also teaches you about the intricacies of life itself.
Creating a 3D Cell Model: A Guide to Building Your Own

Delving into the intricate world of cells can be a fascinating journey. But visualizing these microscopic structures can be a challenge. Creating a 3D cell model is a fantastic way to bring these complex structures to life and gain a deeper understanding of their components and functions.
This guide will walk you through the process of constructing your own 3D cell model, from gathering materials to assembling the intricate details.
Materials and Tools
Before you embark on your 3D cell model adventure, gather the necessary materials and tools. These components will serve as the building blocks for your miniature cell, each playing a crucial role in creating a visually appealing and informative model.
| Material | Description | Purpose |
|---|---|---|
| Styrofoam Balls | Lightweight and easy to shape | Representing the nucleus, organelles, and other cell components |
| Construction Paper | Available in various colors | Creating the cell membrane, cytoplasm, and organelle structures |
| Toothpicks | Thin and sturdy | Connecting different cell components, providing structural support |
| Markers, Crayons, or Paints | For adding color and detail | Creating a visually appealing and informative model |
| Glue or Tape | Securing the components together | Holding the cell model in place |
| Scissors | Cutting construction paper and other materials | Creating the desired shapes for cell components |
| Ruler | Measuring and creating precise shapes | Ensuring accurate proportions for the cell model |
| Optional: Plastic Wrap | Creating a smooth, transparent surface | Representing the cell membrane |
| Optional: Modeling Clay | Versatile material for shaping and sculpting | Adding detail to organelles and other cell components |
Cell Structure and Components

Understanding the fundamental components of a eukaryotic cell is crucial for building an accurate and informative 3D model. These components work together to carry out essential cellular processes, ensuring the survival and function of the cell.
| Cell Component | Structure | Function |
|---|---|---|
| Nucleus | A spherical structure enclosed by a double membrane | Contains the cell’s genetic material (DNA), controlling cellular activities |
| Cytoplasm | The gel-like substance that fills the cell | Provides a medium for cellular reactions and organelle movement |
| Cell Membrane | A thin, flexible barrier that surrounds the cell | Regulates the passage of substances in and out of the cell |
| Mitochondria | Bean-shaped organelles with a double membrane | Produce energy (ATP) through cellular respiration |
| Golgi Apparatus | A stack of flattened, membrane-bound sacs | Processes, packages, and sorts proteins and lipids |
| Endoplasmic Reticulum (ER) | A network of interconnected membranes | Synthesizes proteins, lipids, and steroids; detoxifies harmful substances |
| Ribosomes | Small, granular structures composed of RNA and protein | Synthesize proteins |
| Lysosomes | Small, membrane-bound sacs containing enzymes | Break down waste materials and cellular debris |
Model Design and Construction
Designing your 3D cell model involves considering factors like size, complexity, and desired level of detail. A basic model might focus on the nucleus, cytoplasm, and cell membrane, while a more intricate model could include various organelles.
- Start with the Nucleus:Choose a styrofoam ball of appropriate size to represent the nucleus. This will serve as the central component of your model.
- Create the Cytoplasm:Cut a circle from construction paper slightly larger than the nucleus. This will represent the cytoplasm, the gel-like substance surrounding the nucleus.
- Assemble the Cell Membrane:Use a second piece of construction paper to create a larger circle, representing the cell membrane. You can either cut a hole in the center or use a small piece of plastic wrap to create a transparent membrane.
- Add Organelles:For organelles like mitochondria, Golgi apparatus, and endoplasmic reticulum, use smaller styrofoam balls or cut shapes from construction paper. Attach these components to the cytoplasm using toothpicks.
- Connect the Components:Secure the nucleus, cytoplasm, and cell membrane together using glue or tape. Arrange the organelles within the cytoplasm to accurately reflect their spatial arrangement.
- Add Detail and Color:Use markers, crayons, or paints to add color and detail to your model. Label each component clearly to enhance its educational value.
Visual Representation and Labeling, How to make a 3d cell model

Accurate labeling and visual representation are crucial for conveying the information about cell structure and function. Labeling each component clearly and using appropriate colors and shapes can significantly enhance the model’s educational value.
| Cell Component | Label | Description |
|---|---|---|
| Nucleus | Nucleus | The control center of the cell, containing DNA |
| Cytoplasm | Cytoplasm | The gel-like substance that fills the cell |
| Cell Membrane | Cell Membrane | The outer boundary of the cell, regulating the passage of substances |
| Mitochondria | Mitochondria | Powerhouse of the cell, producing energy (ATP) |
| Golgi Apparatus | Golgi Apparatus | Processes, packages, and sorts proteins and lipids |
| Endoplasmic Reticulum (ER) | ER | A network of membranes involved in protein synthesis and detoxification |
| Ribosomes | Ribosomes | Sites of protein synthesis |
| Lysosomes | Lysosomes | Break down waste materials and cellular debris |
For example, you can use different colors to distinguish the nucleus (dark blue), cytoplasm (light blue), cell membrane (green), mitochondria (red), Golgi apparatus (yellow), and endoplasmic reticulum (purple). Using clear labels with markers or small cards can help viewers easily identify each component and understand its function.
Final Thoughts: How To Make A 3d Cell Model
Building a 3D cell model is more than just a craft project; it’s an engaging journey into the heart of biology. You’ve learned about the essential components of a cell, their functions, and how to represent them accurately in a 3D model.
Whether you’re a student, a teacher, or simply curious about the wonders of life, this project is a rewarding experience that combines creativity, knowledge, and a deeper understanding of the building blocks of life. So, grab your materials, let your imagination run wild, and build your own 3D cell model – it’s a journey that will leave you amazed by the intricate beauty of the microscopic world.
Answers to Common Questions
What is the best material to use for the cell membrane?
A thin, clear plastic wrap or cellophane paper works well for representing the cell membrane, as it mimics its thin and flexible nature.
Can I use everyday objects to represent organelles?
Absolutely! Use small beads for ribosomes, a balloon for the nucleus, and a plastic bottle for the endoplasmic reticulum. Get creative and use what you have on hand.
How can I make my model more interactive?
Add labels to each component, create a pop-up book style model with explanations, or use a digital platform to create an interactive 3D model that allows viewers to explore the cell in detail.